Understanding Bind Mounts and Volumes in Docker Made Simple
Why Should You Care About Docker Storage?
If you’re diving into containers—maybe spinning up a Plex server, experimenting with home automation, or running a little web app—you’ll quickly hit a crucial question: where does all the data live? Containers are great for packaging apps, but they’re a bit like disposable flash drives by default. Shut one down, and everything inside it can vanish.
To keep data safe and persistent, Docker offers two main options: bind mounts and volumes. They’re both ways to connect storage outside your container, but they work in different ways. Knowing when and why to use each can save you hours of headaches, lost data, or confusing troubleshooting.
Let’s break it down from scratch.
What’s a Bind Mount? What’s a Volume? (Jargon Explained)
-
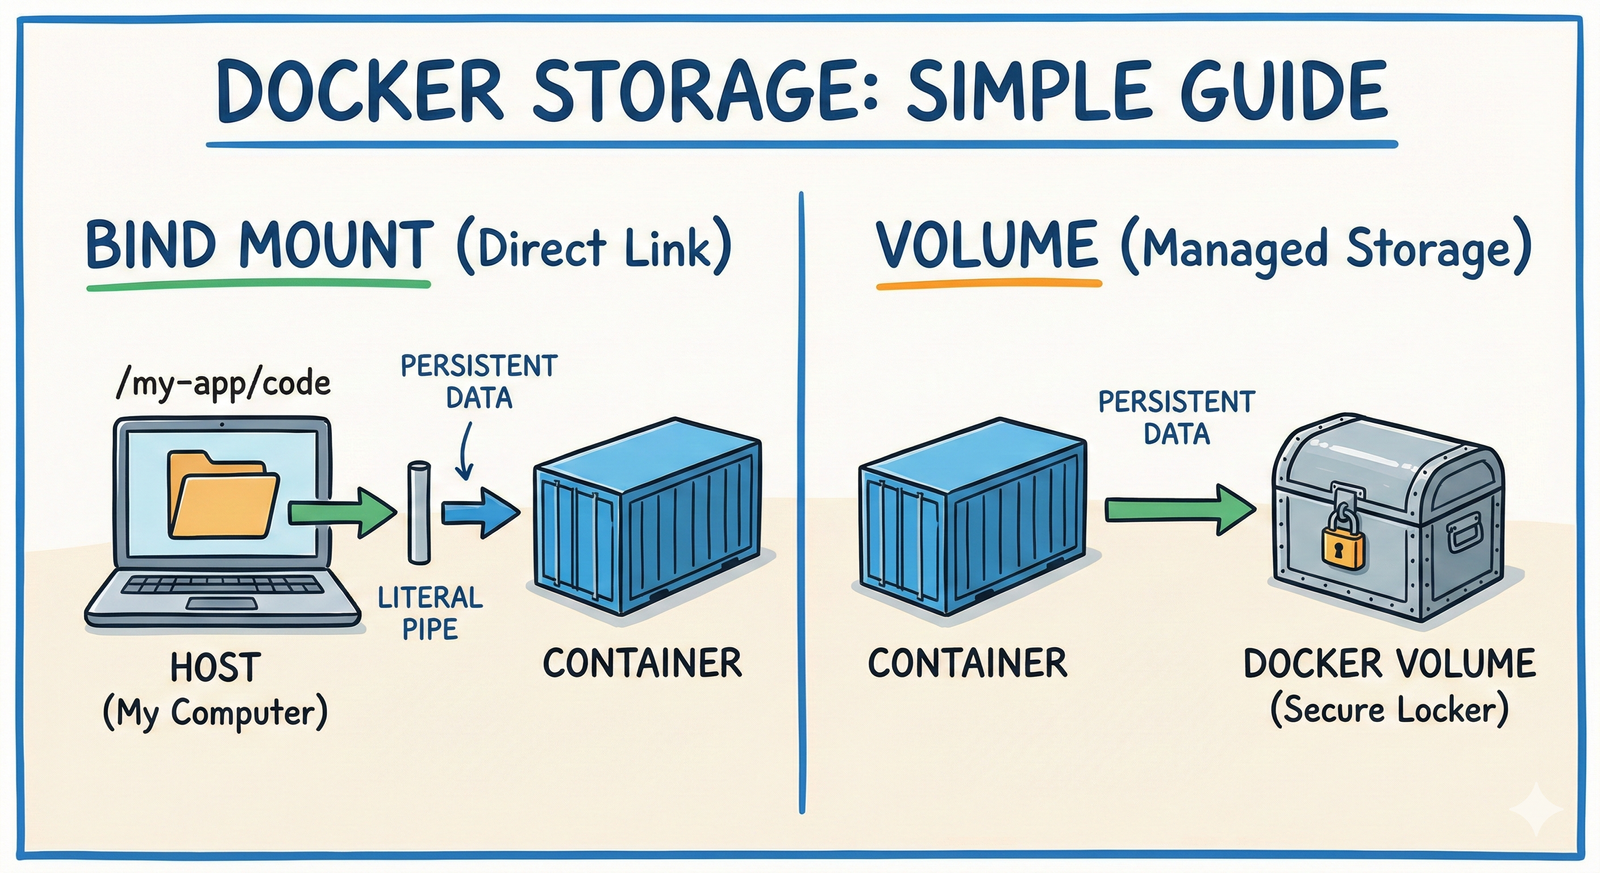
Bind Mount: This is simply linking a folder from your actual computer (the host) into the container at a specific path. Think of it as tying a rope from your desk drawer straight into your backpack. Whatever file you put in the desk drawer is instantly inside your backpack and vice versa.
-
Volume: This is a special storage area managed by Docker itself. It’s like renting a storage unit nearby that Docker controls—it’s not just any folder on your hard drive, but a Docker-crafted space designed for containers to share and keep data.
One more analogy: if containers were apartments, bind mounts are like using your personal storage locker in the building’s basement that you have full control over, and volumes are like going to a storage company that handles and organizes your stuff reliably.
Why Use Either? Basic Use Cases
Bind Mounts
- Perfect when you want to work with files directly on your computer.
- Useful during development because you can edit files on your host and see changes reflected inside the container immediately.
- Example: Mounting your project folder inside a container running code to test changes live.
Volumes
- Great for production or anytime you want Docker to safely handle and isolate your container’s data.
- Docker manages permissions, backups, and data lifecycle better.
- Example: A database container storing its data in a volume to ensure data persists even if the container is removed.
How to Use Them: Step-by-Step Examples
1. Bind Mount Example
Imagine you want to run an Nginx web server container but serve your own HTML files stored on your computer.
mkdir ~/my-website
echo "<h1>Hello from Liam's Office!</h1>" > ~/my-website/index.html

docker run -d \
  --name mynginx \
  -v ~/my-website:/usr/share/nginx/html:ro \
  -p 8080:80 \
  nginx
-v ~/my-website:/usr/share/nginx/html:roattaches your local folder (~/my-website) into the container’s default web folder.- The
:romeans read-only inside the container—so Nginx can serve the file but not change it. - Visit
http://localhost:8080and see your webpage.
2. Volume Example
Say you run a MySQL container and want your database data to persist.
# Create a Docker volume
docker volume create mysql-data

# Run container using the volume
docker run -d \
  --name mysql-db \
  -e MYSQL_ROOT_PASSWORD=my-secret-pw \
  -v mysql-data:/var/lib/mysql \
  mysql:latest
- Docker creates a managed volume called
mysql-data. - The container stores its database files inside the volume.
- Even if you delete the container, the volume and data remain.
Common Pitfalls and Gotchas
-
Permissions Issues with Bind Mounts: Your container might run as a different user than you, leading to “permission denied” errors. You might need to adjust permissions or use
:ro(read-only) if you only need to serve files. -
Relative vs Absolute Paths: Bind mounts require absolute paths on your host machine. Using
-v ./folder:/pathcan sometimes lead to confusion depending on where you run the command. -
Volume Management: Volumes can accumulate if you don’t clean them up (
docker volume prune). Old volumes can eat up disk space quietly. -
Backup Complexity: Data in volumes is isolated from your host filesystem, so back them up carefully. Bind mounts are easier to back up since they’re just your normal folders.
When Bind Mounts Might Not Be Ideal
- If you want reproducible, portable containers without dependence on your host filesystem layout.
- When you want Docker to handle data lifecycle, snapshots, and backups under the hood.
- For multi-container setups where isolated, managed storage reduces accidental side effects.
When Volumes Might Not Be Ideal
- If you’re actively developing code and want instant changes reflected without rebuilding containers.
- When you rely on host-only tools or scripts that must access and modify files directly.
Wrapping Up
At the end of the day, bind mounts are your direct file link between host and container—convenient, fast for development, but sometimes fiddly with permissions. Volumes, on the other hand, are Docker’s custom data stores optimized for persistence, safety, and production use.
In my own home lab, I typically use bind mounts during development of personal apps, so I can tweak files without hassle. But when running databases or stable services, I trust volumes to keep the data safe and neatly tucked away.
So next time you set up a container, ask yourself: Do I want direct file access and flexibility? Or do I want isolation and Docker-managed persistence? That simple question helps you pick the right storage method and saves you from future headaches.
Happy containerizing!


Post Comment